Redmine 安裝篇:Redmine 4.0.x on Ubuntu 16.04
Redmine 的安裝流程相對於一般的網站應用程式來講,是複雜的,特別是如果不熟悉 Ruby on Rails 的生態系,或者不熟悉 Nginx 的配置,那麼整個安裝過程會是非常挫折的。
本文記錄如何在 Ubuntu 16.04 安裝與配置最新版 Redmine 4.0.3 (201905) 筆記,相關資訊放在 GitHub 供參考。
安裝流程
整個流程如下:
- Ubuntu and MySQL
- Permission
- RVM and Ruby
- Passenger and Nignx
- Redmine 4.0.3
- Plugins and Themes
每個項目都會有 安裝、配置、驗證 三個步驟。
1. Ubuntu and MySQL
準備一台乾淨的 Ubuntu 16.04,安裝過程,只要安裝 OpenSSH Server,不要安裝額外像是 LAMP 的套件。
本文在 Proxmox、VMWare、AWS EC2 測試過。
Run as root,安裝 MySQL 必要套件以及 MySQL Server.
1 | ## 安裝必要的套件, |
如果 MySQL 是跑在其他地方,像是 RDS,那麼可以不需要安裝 mysql-server,但是要安裝 libmysqlclient-dev
2. Permission
Run as root,建立 redmine 使用者帳號
1 | ## 建立 Redmine 使用者,資料放在 `/data/redmine` |
3. RVM and Ruby
- 安裝 rvm
- 安裝 ruby 2.3.x (redmine 4.0 需求)
Run as redmine 。
透過 RVM (Ruby Version Manager) 安裝 Ruby。
1 | # 取自官方網站: https://rvm.io |
透過 rvm 安裝 Ruby。
1 | RUBY_VERSION=2.3.8 |
如果發生以下錯誤訊息:
1 | ~$ rvm requirements |
在 /etc/sudoers.d/ 增加一個檔案 redmine,檔案屬性 440,內容如下:
1 | redmine ALL=(ALL) NOPASSWD:ALL |
4. Passenger and Nginx
4-1. Installation
Run as root.
1 | ## 1. 安裝 Passenger PGP key 和 HTTPS support for package manager |
4-2. Configuration
Run as root.
- 編輯
/etc/nginx/nginx.conf - 把這行註解拿掉:
include /etc/nginx/passenger.conf; - 如下所示
1 | ## |
備份 /etc/nginx/sites-available/default,以備不時之需。
1 | cp /etc/nginx/sites-available/default /etc/nginx/sites-available/default.orig |
調整 root directory,額外增加 Passenger 設定。注意以下:
- 這裡指定 redmine 的安裝路徑為
/data/redmine/current/public - 資料上傳的大小為
10m,未來有需要再做調整
1 | root /data/redmine/current/public; |
把 location 段落註解掉:
1 | #location / { |
4-3. Validate and Check
Run as root.
- 更改
/var/www權限:chown -R www-data /var/www - 重啟 nginx:
systemctl restart nginx - 驗證 Passenger and NGINX:
/usr/bin/passenger-config validate-install,如下圖: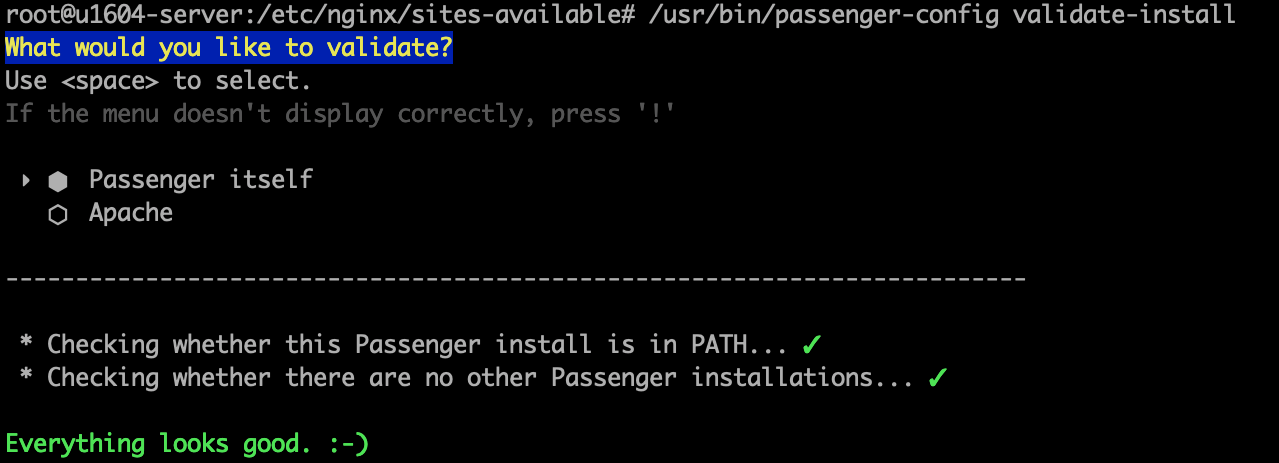
1.. 檢查 NGINX 狀態與 Passenger process:/usr/sbin/passenger-memory-stats,如下圖: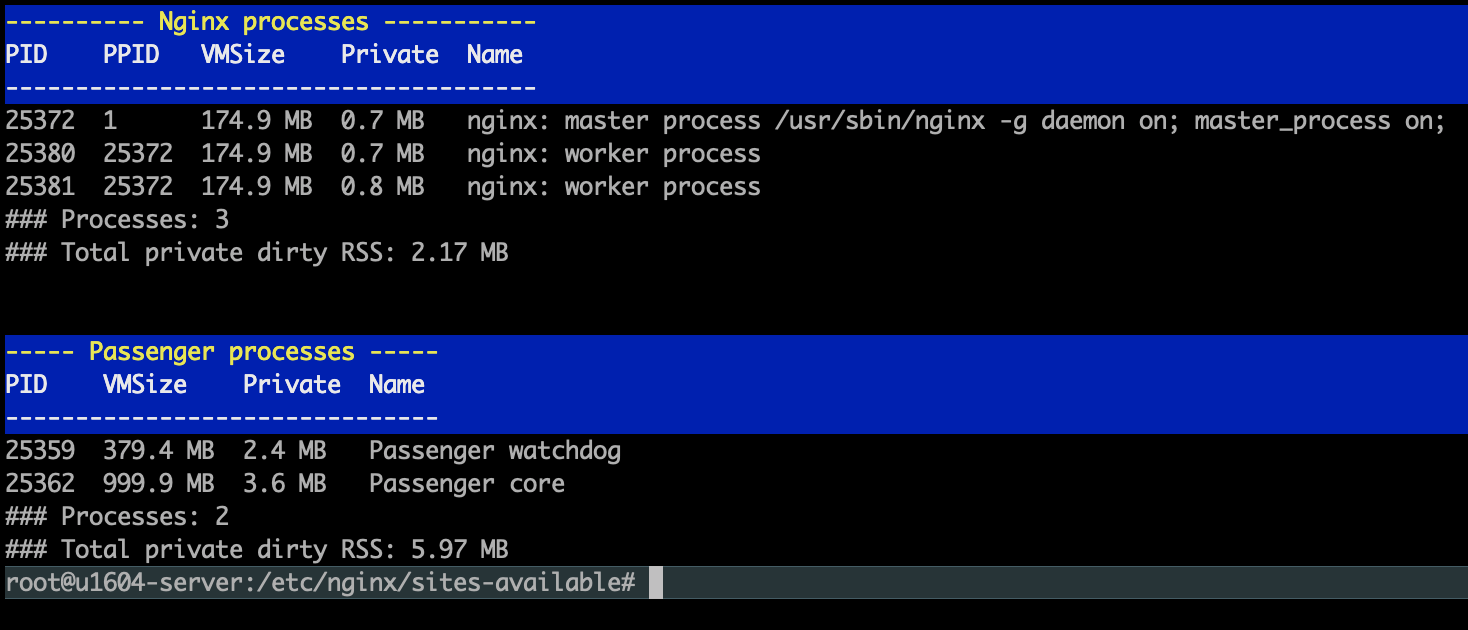
5. Redmine 4.0.x
5-1. MySQL and Database
設定 MySQL,注意以下:
- 注意 Encoding,支援 emoj 必須使用
utf8mb4 - 記得設定密碼
1 | CREATE DATABASE redmine CHARACTER SET utf8mb4 COLLATE utf8mb4_unicode_ci; |
5-2. Install Redmine 4.0.x
Run as redmine.
1 | ## 1. 下載官方 Image |
5-3. Restart Redmine via Nginx
- 重啟 nginx:
sudo systemctl restart nginx - 瀏覽
http:<SERVER_IP>,正常的話就可以看到 Redmine 的登入畫面,預設admin/admin登入 - 在 Redmine 裡驗證以下幾個點:
- 點選 Administration -> Settings
- 點選 Administration -> Projects
- 點選 Administration -> Plugins
- 點選 Administration -> Workflow
- 這些都沒問題就可以了。
6. Plugins and Themes
Redmine 的 Plugins 安裝大部分雷同,相關參閱: Redmine Plugins and Themes
GitHub
本文相關的安裝資訊,同步放在 GitHub 供參考。
延伸閱讀
系列文章
- 系統篇:
- 概念篇:
站內延伸
- 協同合作系統建制與導入 - 以 Redmine 為例
- Issue Tracking in Redmine
- Integrate GIT in Redmine
- Redmine Plugins and Themes
- Software Development Lifecycle
參考資料
Comments
About
著作
演講
- 演講錄影 @ Youtube
- 探索職涯、複利人生 - AWS Career Exploration Day 2023
- 個人著作 SRE 書友見面會
- 軟體測試實務 - 新書發表會
- 探索職涯、成就未來 - AWS Career Exploration Day 2022
- 從理想、到現實的距離,開啟品味軟體測試之路
- 91APP 在 AWS 上的 SRE 實踐之路
- 在矩陣型組織裡,如何有效管理 AWS 的成本結構與系統架構
- 災難演練 @ AWS 實戰分享
- 導讀持續交付 2.0 - 談當代軟體交付之虛實融合
- 聊聊軟體交付的濫觴 談產出物管理
- 從緊急事件 談 SRE 應變能力的培養
- 邁向 API 經濟 - API Gateway 導入之旅
- Monitoring Tools 大亂鬥 - AWS CloudWatch
- Ops as Code using Serverless
- 淺談系統監控與 CloudWatch 的應用
AWS Certifications